Mar 05, 2024 by SkilledEngg
In this article, I will explain the detailed step by step guide to install Java 22 on Mac OS system. To install Java here in this post, we will not use homebrew.
Table of Contents:
If you want to prefer video tutorial, then you can refer the following video to install Java JDK 22 on Mac System.
Youtube Video Link: https://youtu.be/cBCElJOrr4Q
Installation Steps
Step 1: Open the Oracle’s official website.
Link: https://www.oracle.com/in/java/technologies/downloads/
Step 2: Here, you need to click on JDK 22 tab as shown in the image.
Step 3: Then you need to select the macOS option among different operating systems listed on the page.
Step 4: Now, if your mac system is Intel based Mac then you need to select x64 DMG Installer option. Otherwise if your system is Silicon based Mac System then you need to select ARM64 DMG Installer option.
To check the type of Mac, you are using:
you can check this by clicking on apple icon on top-left corner of your mac. Then you need to select ‘About This Mac’ like shown in the image.
Case 1: If, here the Chip type is Intel then your system is intel based mac.
Case 2: And if, the Chip type is Apple M1 or Apple M2 or something similar then you are using silicon based mac system.
Still, If you are confused to decide your mac type (Intel or Silicon Based) then you can refer following video:
Video Link : https://youtu.be/P3AZAi8vmvg
Step 5: After downloading the DMG file according to your mac type, you need to double click on the DMG file.
Step 6: Now, one popup wizard will open up. You need to click on the Next.
Step 7: Now, at last you need to click on Agree.
Step 8: Now, the installation will startup. It will take some time.
Setting Up JAVA_HOME Variable
Step 9: To setup this variable, you need to open up the .zshrc or .bashrc file which is present in the home directory. So, first we will go to home directory with cd command like shown in the image.
Step 10: Now, you need to run ls -la ~/ command to list down all the content.
Step 11: Now, you need to look for either .zshrc or .bashrc file there.
(If catalina or higher OS version => Then .zshrc file)
(Else if lower than catalina OS version => Then .bash_rc file)
NOTE: If no file is present in your system, then you would need to create this file using the following command.
touch .zshrc
Step 12: Now, open up this file using following command:
vi .zshrc
Step 13: You need to press i (for insert mode) key on the keyboard to enter into the insert mode.
Step 14: Now, here we will add the following line of code to set the JAVA_HOME variable.
JAVA_HOME=/Library/Java/JavaVirtualMachines/jdk-22.jdk/Contents/Home
Step 15: Now, you need to exit from the insert mode by pressing ‘esc‘ key on the keyboard.
Step 16: Then, you need to type :wq (colon, ‘w’ , ‘q’) like shown in the image:
Step 17: After that you will have to hit return key on keyboard so that you will come out of the vi editor.
Step 18: To make the changes effective, we will source the .zshrc file (or .bashrc file) using following command on terminal. source ~/.zshrc
Verification of Successful Java Installation
Step 19: Once this is installed, we will verify once using the terminal. To open the terminal you need to press Command + Space and type Terminal.
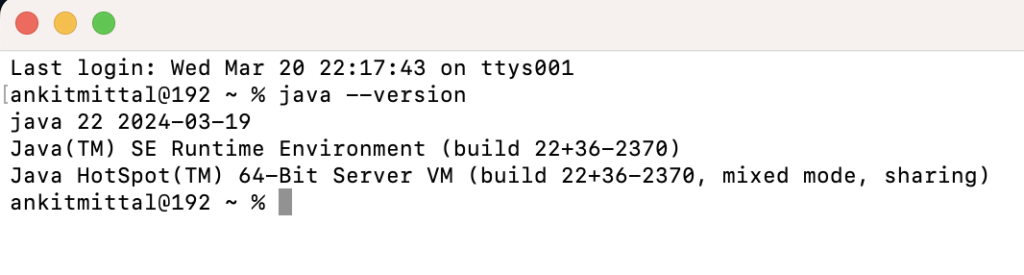
Step 20: Now on terminal, type the following command : java –version
Step 21: If the you get output something like the shown image, then it means the installation is successful.
NOTE: If you are managing multiple java version then you can refer the following video to learn better handing of multiple Java versions on your system.
Video Link: https://youtu.be/s1Ve9JrQYjs
To install Java 22 using homebrew, you can refer following post:
POST Link:
Hello there, just became aware of your blog through Google, and
found that it is really informative.
I’ll appreciate if you continue this in future.
Many people will be benefited from your writing.
Cheers!